

Friday, December 2, 2011
Friday, November 25, 2011

Rustic Stable
I needed a stable to put my horses in. This one has 10 stalls, and each stall can fit 3 ABC horses nicely, so enough room for mommy daddy and the little one ;)


Wednesday, November 16, 2011
Log Fence
Well..making horses, they need a fence to go in, so I had to make one. Plus I couldn't find any natural looking log style fence on the market, so now there is one! :)

Tuesday, November 1, 2011

Thursday, October 20, 2011
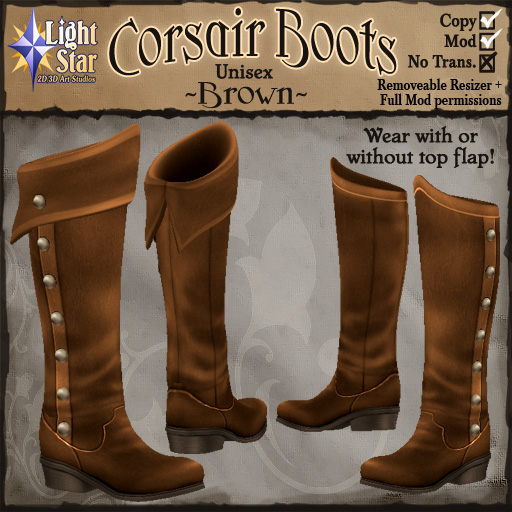
A few new items
Here are a couple new items I did this month. With more boots and riding accessories/clothes to come in the near future!


Monday, September 26, 2011


Wednesday, September 14, 2011

Saturday, August 6, 2011
ABC Horses
I've been doing a lot of work lately on a new breedable horse for ABC -Awesome Breed Creations. I do the textures for the horses, as well as tweaking existing and making new sculpts. A lot to come from them in the near future, check out their website for more details!


Friday, June 24, 2011

Friday, May 27, 2011


Wednesday, April 27, 2011

Tuesday, April 26, 2011


Sunday, April 3, 2011
Gimp Basics for SL
How to do some simple image editing in Gimp for Second Life
-Download Gimp from here: http://www.gimp.org/downloads/
-Watch Torley Linden's video here on how to make SL use less computer resources when you are using other programs on your computer. This will make having SL open along with doing image editing, etc, a lot faster for slower computers: http://vodpod.com/watch/5778387-make-the-viewer-multitask-better-with-backgroundyieldtime-second-life-viewer-2-5-tutorial?u=secondlifeshowcase&c=secondlife
How to organize your Gimp toolbars
When you first open Gimp, it looks a bit messy and confusing. So there are some simple things you can do to improve the workspace. And of course, you do not have to use this set up, you can place things however you'd like! This is just the way I like to have it setup.
1. Maximize the middle "blank" window. The one with the title "GNU Image Manipulation Program".
2. Drag the toolbox over to the left side, just underneath the File menu.
3. Click on the icon for the layers palette, and holding down the left mouse button, drag it over to the bottom of the toolbox until you see a highlighted line show up(for me it's blue). Do this for the other palettes next to layers. They should all line up like they did before, but in their new place! If you don't like them here, you can always drag them back out again.
4. Drag the brushes icon and put it in the middle of the tools box, above the layers, etc, but below the tools themselves. Do this for the Patterns and Gradients as well.
5. Hovering your mouse cursor over the bottom border of the toolbox lets you resize it. So size it to fit your screen. You can also resize the Layers, etc, or the middle tool section where the brushes, etc went too by hovering, clicking and dragging to the correct size. The cursor will change shape when you hover over the right spot.
New organized Interface!
How to take a good screenshot of your item in SL with a blank background, good for inserting in a product display template.
1. Rezz a cube on the ground. Set it to full bright and a blank texture. Set the color of it to any that is not in the item you want to take a picture of. This is your "green or blue screen".
2. Stretch the cube out really big so that when you rezz your object on it whatever angle you rotate the camera at you should see this background cube.
3. Rezz your item and position the camera how you want it for a picture of the item.
4. Duplicate the cube if needed for additional background if your camera angle gets sky or other things in it.
5. Take a screenshot! You can do this using SL's built in screenshot function and saving the image to disk, or press alt+printscreen(prtscn) on your keyboard.
Cropping the image in Gimp.
1. Open Gimp and choose to either:
a. File>Open.. and find the file you saved using the SL screenshot function
b. File>Create>From Clipboard.. if you did alt+printscreen.
2. Next we need to crop out any interface extras that are in your screenshot. Click the Crop tool from the Toolbox(it looks like an xacto knife), then draw a box around your item in the image. Double click in the middle to crop!
*Note: You can change the size of the rectangle you draw by putting your cursor over the edges and corners, then dragging them.
3. Save your image. File>Save. Always save to prevent accidentally loosing your work!
Removing the blank background in Gimp.
1. Click the "Fuzzy Select" tool. It's the one that looks like a magic wand(also called magic wand in other programs).
2. Click anywhere in the blank background of your image. This will select all of the same color that is contiguous. So, because not all areas with your background are contiguous, you will have to select the others too next.
3. Hold down the Shift key, and then click any other places the selection didn't pick up. So now all of your blank background should be selected.
4. Look at your Layers palette. Right click on the layer you see there and choose Add Alpha Channel. No idea why Gimp doesn't do this by default :p
5. Now, with your selection still showing, hit the delete key. This will erase the background and give you a transparent alpha layer! You'll know if it's transparent or not because the transparency is shown by a checkered block background pattern, as show in the picture below.
6. Deselect by going to the Select menu and choosing None.
7. Save your file. You can use this to paste into any template image you have!
Adding a background color to a transparent/alpha layer.
If you want, you can create a new background layer with any color or image you'd like after you've got your item with a transparent background as shown above.
1. In your Layers Palette, click to add a New Layer. It's the icon at the very bottom that looks like a piece of paper. You can name it however you'd like. I'll go with Background color here.
*Note: You can rename a layer any time you want by double clicking on the text next to the layer pic and typing a new name!
2. Move the Layer to the bottom by clicking on it and dragging it downard.
3. Find and click on the Paint Bucket tool in the Toolbox.
4. Make sure in your tool options(below the toolbox) FG color fill is checked(FG=Foreground).
5. Click on the top color box in the ToolBox, and choose a color you'd like from the sliders and palettes there. Hit OK when you're done.
6. Next, click to select your Background Color layer. Then, anywhere in the image left click and it will fill in the background with the color you chose!
-Download Gimp from here: http://www.gimp.org/downloads/
-Watch Torley Linden's video here on how to make SL use less computer resources when you are using other programs on your computer. This will make having SL open along with doing image editing, etc, a lot faster for slower computers: http://vodpod.com/watch/5778387-make-the-viewer-multitask-better-with-backgroundyieldtime-second-life-viewer-2-5-tutorial?u=secondlifeshowcase&c=secondlife
 |
| Default Gimp setup |
When you first open Gimp, it looks a bit messy and confusing. So there are some simple things you can do to improve the workspace. And of course, you do not have to use this set up, you can place things however you'd like! This is just the way I like to have it setup.
1. Maximize the middle "blank" window. The one with the title "GNU Image Manipulation Program".
2. Drag the toolbox over to the left side, just underneath the File menu.
3. Click on the icon for the layers palette, and holding down the left mouse button, drag it over to the bottom of the toolbox until you see a highlighted line show up(for me it's blue). Do this for the other palettes next to layers. They should all line up like they did before, but in their new place! If you don't like them here, you can always drag them back out again.
 |
| Step 3 |
4. Drag the brushes icon and put it in the middle of the tools box, above the layers, etc, but below the tools themselves. Do this for the Patterns and Gradients as well.
 |
| Step4 |
New organized Interface!
 |
| New interface layout |
How to take a good screenshot of your item in SL with a blank background, good for inserting in a product display template.
1. Rezz a cube on the ground. Set it to full bright and a blank texture. Set the color of it to any that is not in the item you want to take a picture of. This is your "green or blue screen".
2. Stretch the cube out really big so that when you rezz your object on it whatever angle you rotate the camera at you should see this background cube.
3. Rezz your item and position the camera how you want it for a picture of the item.
4. Duplicate the cube if needed for additional background if your camera angle gets sky or other things in it.
5. Take a screenshot! You can do this using SL's built in screenshot function and saving the image to disk, or press alt+printscreen(prtscn) on your keyboard.
Cropping the image in Gimp.
1. Open Gimp and choose to either:
a. File>Open.. and find the file you saved using the SL screenshot function
b. File>Create>From Clipboard.. if you did alt+printscreen.
2. Next we need to crop out any interface extras that are in your screenshot. Click the Crop tool from the Toolbox(it looks like an xacto knife), then draw a box around your item in the image. Double click in the middle to crop!
*Note: You can change the size of the rectangle you draw by putting your cursor over the edges and corners, then dragging them.
3. Save your image. File>Save. Always save to prevent accidentally loosing your work!
Removing the blank background in Gimp.
1. Click the "Fuzzy Select" tool. It's the one that looks like a magic wand(also called magic wand in other programs).
2. Click anywhere in the blank background of your image. This will select all of the same color that is contiguous. So, because not all areas with your background are contiguous, you will have to select the others too next.
3. Hold down the Shift key, and then click any other places the selection didn't pick up. So now all of your blank background should be selected.
4. Look at your Layers palette. Right click on the layer you see there and choose Add Alpha Channel. No idea why Gimp doesn't do this by default :p
5. Now, with your selection still showing, hit the delete key. This will erase the background and give you a transparent alpha layer! You'll know if it's transparent or not because the transparency is shown by a checkered block background pattern, as show in the picture below.
6. Deselect by going to the Select menu and choosing None.
7. Save your file. You can use this to paste into any template image you have!
 |
| Transparent background |
Adding a background color to a transparent/alpha layer.
If you want, you can create a new background layer with any color or image you'd like after you've got your item with a transparent background as shown above.
1. In your Layers Palette, click to add a New Layer. It's the icon at the very bottom that looks like a piece of paper. You can name it however you'd like. I'll go with Background color here.
*Note: You can rename a layer any time you want by double clicking on the text next to the layer pic and typing a new name!
2. Move the Layer to the bottom by clicking on it and dragging it downard.
3. Find and click on the Paint Bucket tool in the Toolbox.
4. Make sure in your tool options(below the toolbox) FG color fill is checked(FG=Foreground).
5. Click on the top color box in the ToolBox, and choose a color you'd like from the sliders and palettes there. Hit OK when you're done.
6. Next, click to select your Background Color layer. Then, anywhere in the image left click and it will fill in the background with the color you chose!
Sunday, March 6, 2011
Color changeable Cloak & Gloves, Canvas Pants
So I didn't want to have to make the cloaks and gloves in every color, so I made them color changeable!(via the standard SL edit menu).
And also a pair of canvas pants in 5 different colors. They use the same stitching details as the leather pants, just the color and texture is different.


And also a pair of canvas pants in 5 different colors. They use the same stitching details as the leather pants, just the color and texture is different.


Subscribe to:
Posts (Atom)